|
<< Click to Display Table of Contents >> NShape Basic Tutorial Basic Tutorial: Layout |
  
|
|
<< Click to Display Table of Contents >> NShape Basic Tutorial Basic Tutorial: Layout |
  
|
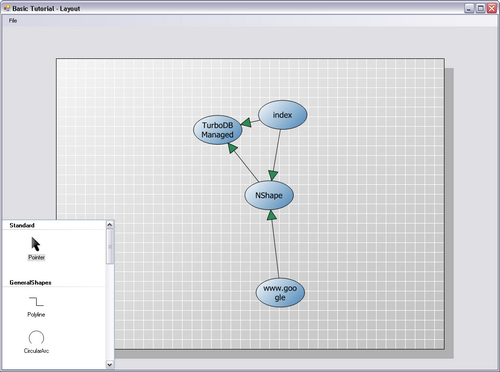
In this step you will learn how to apply an automatic layout to a diagram.
In order to get a presentable diagram a reasonable layout of the shapes is required. This can be achieved using the NShape layouter classes. There are different layouters in NShape for different kinds of diagrams, for example a grid layouter, which positions the shapes in a regular grid, a repulsion layouter, which uses an algorithm of repulsive forces to distribute the shapes, and others.
All layouters have the same basic usage schema:
| 1. | Add the namespace Dataweb.NShape.Layouters. |
| 2. | Create a layouter of the desired class. |
| 3. | Assign the shapes that shall be layouted. |
| 4. | Set the parameters for the layout. |
| 5. | Execute the layouting. |
In the WebVisits example you have to do the following:
| 1. | Add a menu item File > Layout and create a handler for it. |
| 2. | In the handler first move all shapes to the same position. This is the start configuration for which the repulsion layouter works best. |
| 3. | Then create and execute the layouter as described before. |
| 4. | Finally, use the layouters Fit method to center the diagram on the page. |
| 5. | Run the application, load the web stats and then run the layout. |

Automatic layouting is a complex subject and usually you will need to run more than one layouter to get a good result. And a perfect result will always require some manual adjustment. Read the layouting topics in the tasks section of the online help to learn more about it.
Here is the code:
// First, place all shapes to the same position
|
Tutorial Navigation